Choosing a bsa threaded bottom bracket starts with checking the frame, not browsing product names. BSA, also called English threading, commonly uses a 1.37-inch diameter and 24 threads per inch. That detail narrows the options, but it does not settle every fit question. Shell width, crank interface, spindle length, and intended use still matter.
Measure carefully. A ruler can help, but calipers give a more dependable shell-width reading. Many road frames use a 68 mm shell, while some mountain bikes use 73 mm. Verify the frame markings or manufacturer’s specifications before ordering. A small measurement error can mean extra spacers, poor chainline, or a crank that will not seat correctly. Annoying, and avoidable.
In 2026, shoppers will find threaded units ranging from simple sealed cartridge designs to lighter external-cup systems. The best choice depends on your crankset, riding conditions, service preferences, and budget—not the newest label. Check the manufacturer’s compatibility chart, confirm the required spindle or axle standard, and follow the stated installation torque. If those details are unclear, pause and ask a qualified mechanic rather than forcing the cups into the frame.
This guide explains what to compare and which specifications deserve attention. It also considers durability, ease of maintenance, and realistic replacement costs. Compatibility charts are useful, but they can still leave one awkward question: will this exact unit match your crank? A careful check beats a confident guess.
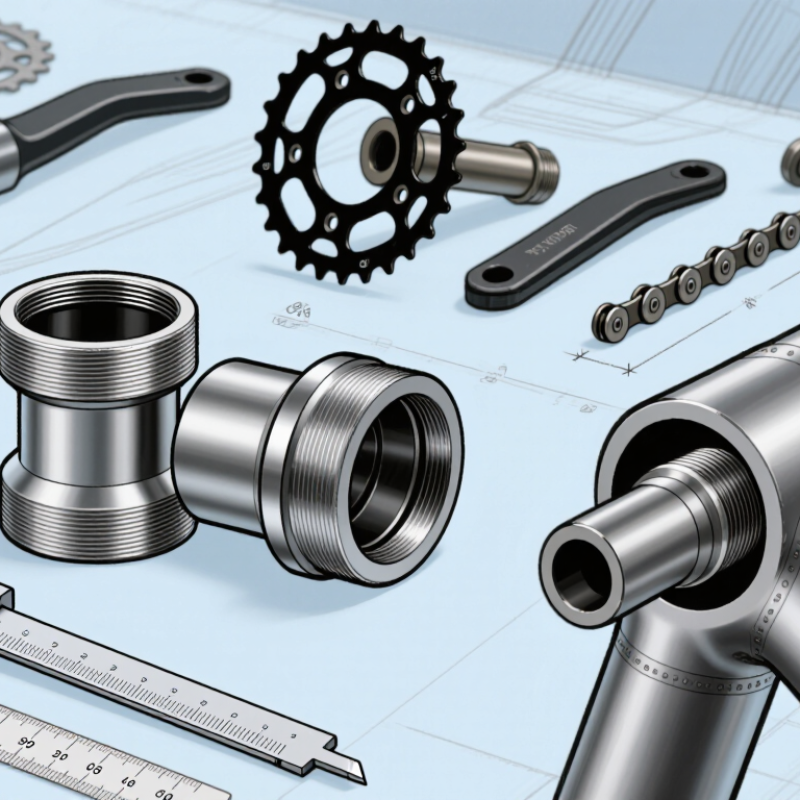
BSA is a threaded bottom bracket standard, often called English threading. The frame shell has a nominal diameter of 1.37 inches and 24 threads per inch. Most BSA shells are 68 or 73 millimetres wide, but measure yours rather than relying on the bike category. The drive-side cup tightens counterclockwise; the non-drive-side cup tightens clockwise. That detail matters. Cross-threading can damage the frame.
When choosing a unit, check two separate fits: the frame’s shell and the crankset’s spindle. A BSA label confirms the thread type, not spindle compatibility. Compare shell width, spindle diameter, and interface details with the crankset requirements. Some systems use external cups; others sit inside the shell. The outside shape alone can be misleading. Not quite a simple swap.
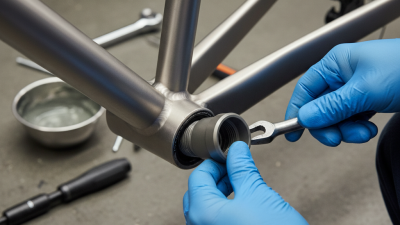
In a workshop, I would clean the frame threads and inspect them for damage before installation. Cups should start smoothly by hand. If one binds, stop and check alignment instead of forcing it; a stiff first turn is easy to dismiss, and that can become an expensive mistake. Use the specified grease or assembly compound, and follow the component maker’s torque guidance. I still double-check shell width, because older frames and unusual designs can surprise you.
Measure the frame shell before choosing a BSA bottom bracket. Remove the existing unit and clean the shell faces, since grease or dirt can affect the reading. Use calipers to measure between the two outer faces of the frame shell, not across the cups. Measure twice. Common BSA shell widths are 68 mm and 73 mm, but confirm the frame maker’s specification if your measurement differs.
Check the threading as well as the width. A standard BSA shell uses 1.37 × 24 TPI threads. Viewed from the drive side, its cup tightens counterclockwise; the non-drive-side cup tightens clockwise. Easy to mix up. Do not force a cup that resists turning, since cross-threading can damage the frame. Clean, undamaged threads should allow the correct cup to engage smoothly by hand.
Shell width is not the same as spindle length, so do not use one measurement to guess the other. Match the bracket’s stated shell width and BSA threading, then check its axle or spindle compatibility with your crankset. Some frames look like standard threaded shells but use a different system; appearance alone is not reliable. If the thread type is uncertain, pause and verify it before installation. I would rather recheck a measurement than discover a mismatch halfway through fitting.
The BSA label describes the frame’s threaded shell, not the crank compatibility. Most BSA shells use a 1.37-inch, 24-TPI thread, but shell width still matters. Measure it before ordering; common widths include 68 and 73 millimetres. A few millimetres can change fit.
Now match the bottom bracket to the crank’s spindle interface. Square-taper, splined, and external-bearing cranks need different bottom bracket designs. Spindle diameter alone is not enough. Check the crank maker’s specified interface and spindle length, then confirm the required chainline. A mismatch can leave the chain rubbing or the crank arms sitting too far out. It may still turn smoothly on a work stand.
Small details count. Check the frame shell for damaged threads and confirm the cup direction before installation. BSA cups tighten in opposite directions on the drive and non-drive sides. If you are replacing an old unit, record its width and spindle details, but don’t assume the old setup was correct. I’ve seen that assumption waste a second installation. When the crank model or spindle is unclear, pause and verify the specification rather than guessing from appearance. A clean fit should not require force.
A BSA threaded bottom bracket can look straightforward, but bearing choice only works after the frame and crank match. Check the shell width, usually 68 or 73 millimeters, and confirm the crank’s spindle standard. BSA shells use a 1.37-inch, 24-thread-per-inch interface; correct thread engagement matters. Fit comes first. If installation feels rough or cross-threaded, stop and recheck rather than forcing the cups.
Sealed cartridge bearings are simple to replace as a unit and suit riders who want low-maintenance commuting or all-weather use. External-cup systems can offer accessible, replaceable bearings, though mud and frequent washing may shorten service life. Steel bearings are commonly chosen for dependable value and toughness. Ceramic balls may reduce friction in some conditions, but they cost more and do not automatically last longer, especially if contamination reaches the races. Quiet is not everything.
Match the materials and bearing design to your rides, not just a specification sheet. For wet roads and daily mileage, prioritize effective sealing and easy replacement. For dry recreational rides, a standard steel-bearing unit may be entirely adequate. Lightweight alloy cups save a little weight, but careful installation and compatible tools matter more. It is easy to overvalue small efficiency claims; real-world gains depend on fit, cleanliness, and maintenance. Recheck for play after installation, and follow the maker’s torque guidance.
Before buying a BSA threaded bottom bracket, confirm the frame’s shell width and thread condition. ISO 6691:2011 specifies bicycle bottom-bracket thread dimensions; the common BSA pattern uses a nominal 1.37-inch diameter and 24 threads per inch. Measure the shell with calipers, rather than trusting an old parts label. Check for crushed threads, paint buildup, or corrosion around the openings. Small details matter.
During installation, clean both sides and test each cup by hand before using a tool. The drive-side cup has a left-hand thread, so it tightens counterclockwise; forcing it the wrong way can damage the frame. Follow the component maker’s torque and lubrication instructions, since materials and designs differ. After fitting, check for smooth rotation and side-to-side play. Recheck after the first few rides, especially if the bicycle sees rain or gritty roads. At routine service, listen for creaks and inspect for looseness or water ingress. Noise is not always the bottom bracket; pedals and cranks can imitate it. I’d still recheck the shell measurement, even when the old unit appears to fit.
| Check | Common Specification or Requirement | How to Verify | Why It Matters |
|---|---|---|---|
| BSA thread standard | Typically 1.37 in × 24 TPI; the drive-side cup uses a left-hand thread, and the non-drive-side cup uses a right-hand thread. | Check the frame documentation or identify the shell standard. Do not force a cup if it resists threading. | Correct thread direction and specification help prevent cross-threading and frame damage. |
| Frame shell width | Common widths include 68 mm and 73 mm. Measure the bare frame shell, excluding spacers and cups. | Use calipers or a suitable ruler across the shell faces; confirm the measurement against the bottom bracket instructions. | Shell width affects fit, spacer arrangement, and crank installation. |
| Crank spindle interface | Examples include square taper, splined interfaces, and 24 mm or larger-diameter spindle systems. These are not interchangeable by appearance alone. | Identify the crank model or measure the spindle and check the crank manufacturer’s compatibility information. | The bottom bracket must match the crank’s spindle design and required spindle length. |
| Crank and frame clearance | The crankset must be compatible with the frame, shell width, and intended chainline. | Check the crank instructions for chainline, spacer placement, and frame-clearance requirements. | Incorrect spacing can cause poor shifting, rubbing, or insufficient crank clearance. |
| Tools and installation | Many threaded cups require a specific bottom-bracket tool. Required tool profiles vary by cup design. | Match the tool to the cup and follow the component instructions. Clean the shell threads before fitting. | A correctly fitting tool reduces the risk of damaging the cup or its tool interface. |
| Lubrication and tightening | Use the grease or thread treatment specified for the frame and bottom bracket. Tightening torque is component-specific. | Follow the manufacturer’s installation instructions and use a torque wrench when a torque value is provided. | Correct preparation and tightening help prevent loosening, creaking, and thread damage. |
| Routine inspection | Check for unusual play, rough rotation, creaking, or water and grit ingress; inspection frequency depends on riding conditions. | With the bike safely supported, check for crank movement and listen or feel for roughness while turning the cranks. | Early checks can identify contamination, wear, or a fitting issue before it worsens. |
| Cleaning and service | Service requirements vary by bearing design, seals, weather exposure, and use. Some units are serviceable; others are replaced as assemblies. | Follow the product service instructions. Avoid directing high-pressure water at the bearing area. | Appropriate cleaning helps limit contamination without forcing water past seals. |
| When to replace | Replacement may be appropriate if the unit remains rough, develops persistent play, or is damaged after correct adjustment and inspection. | Confirm that the crank and installation are sound before diagnosing the bottom bracket; seek a qualified mechanic if uncertain. | Symptoms can also come from other components, so diagnosis helps avoid unnecessary replacement. |
This website uses cookies to ensure you get the best experience possible. Learn more.